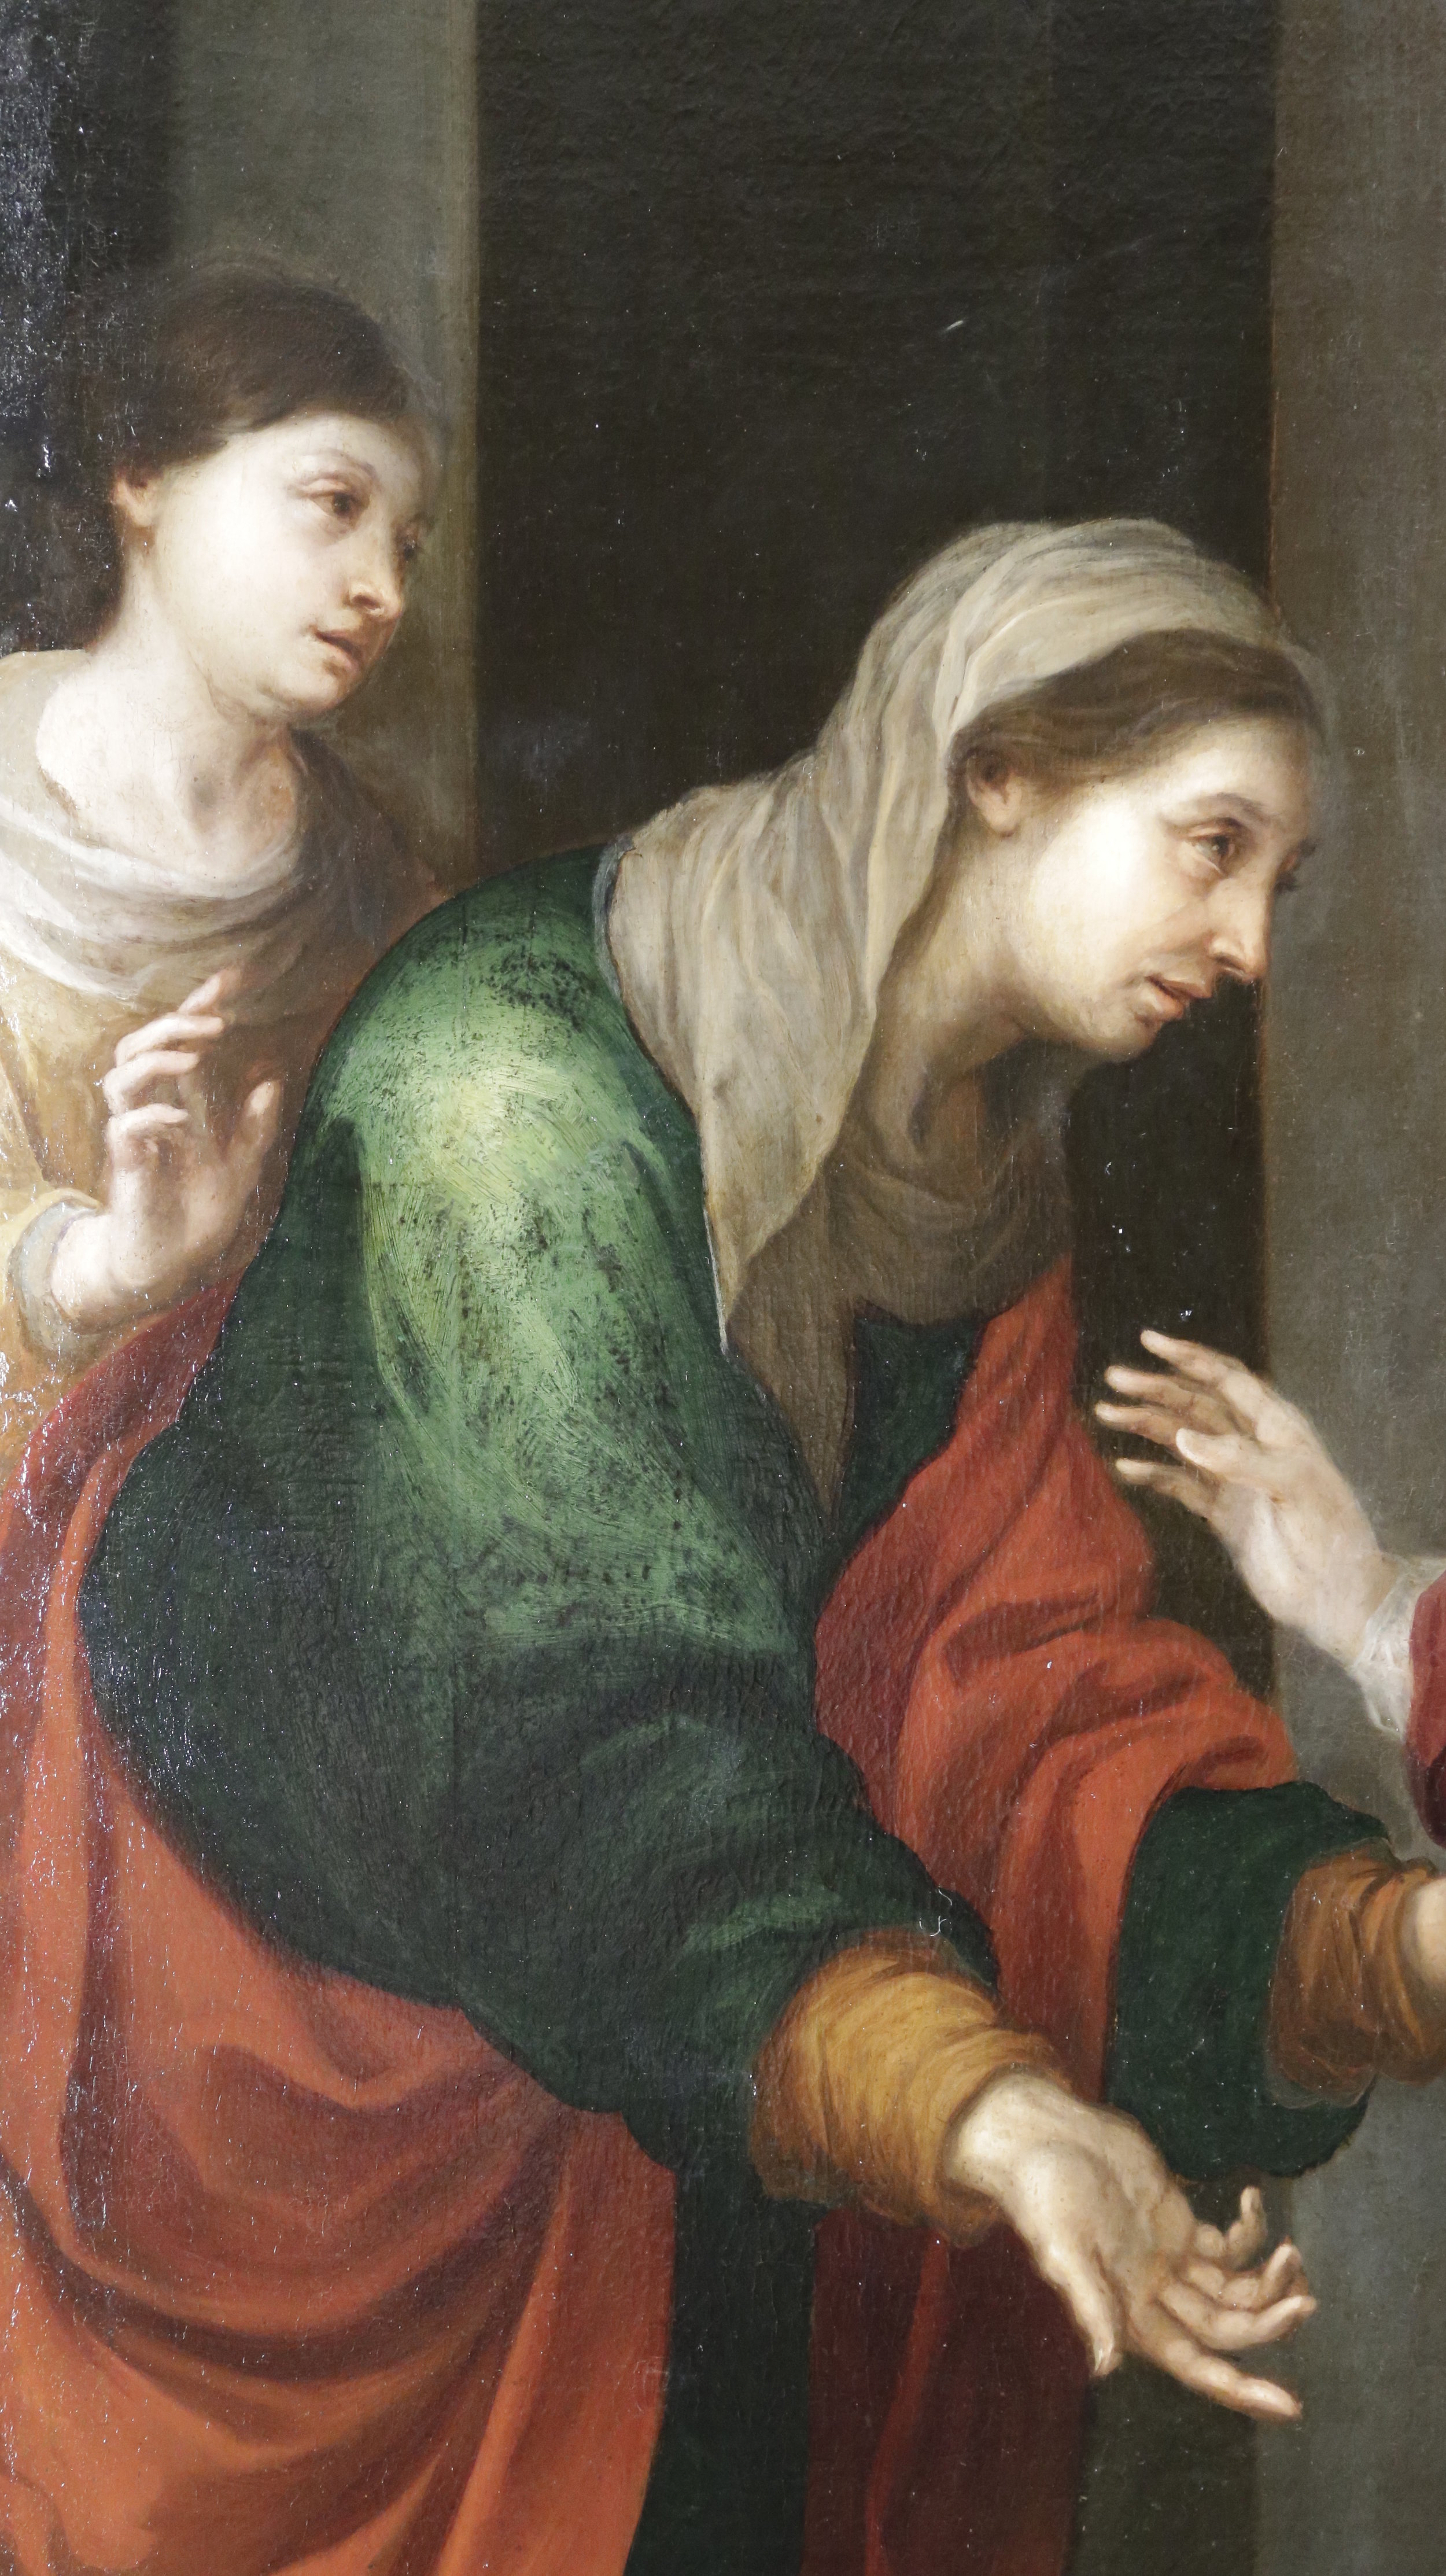
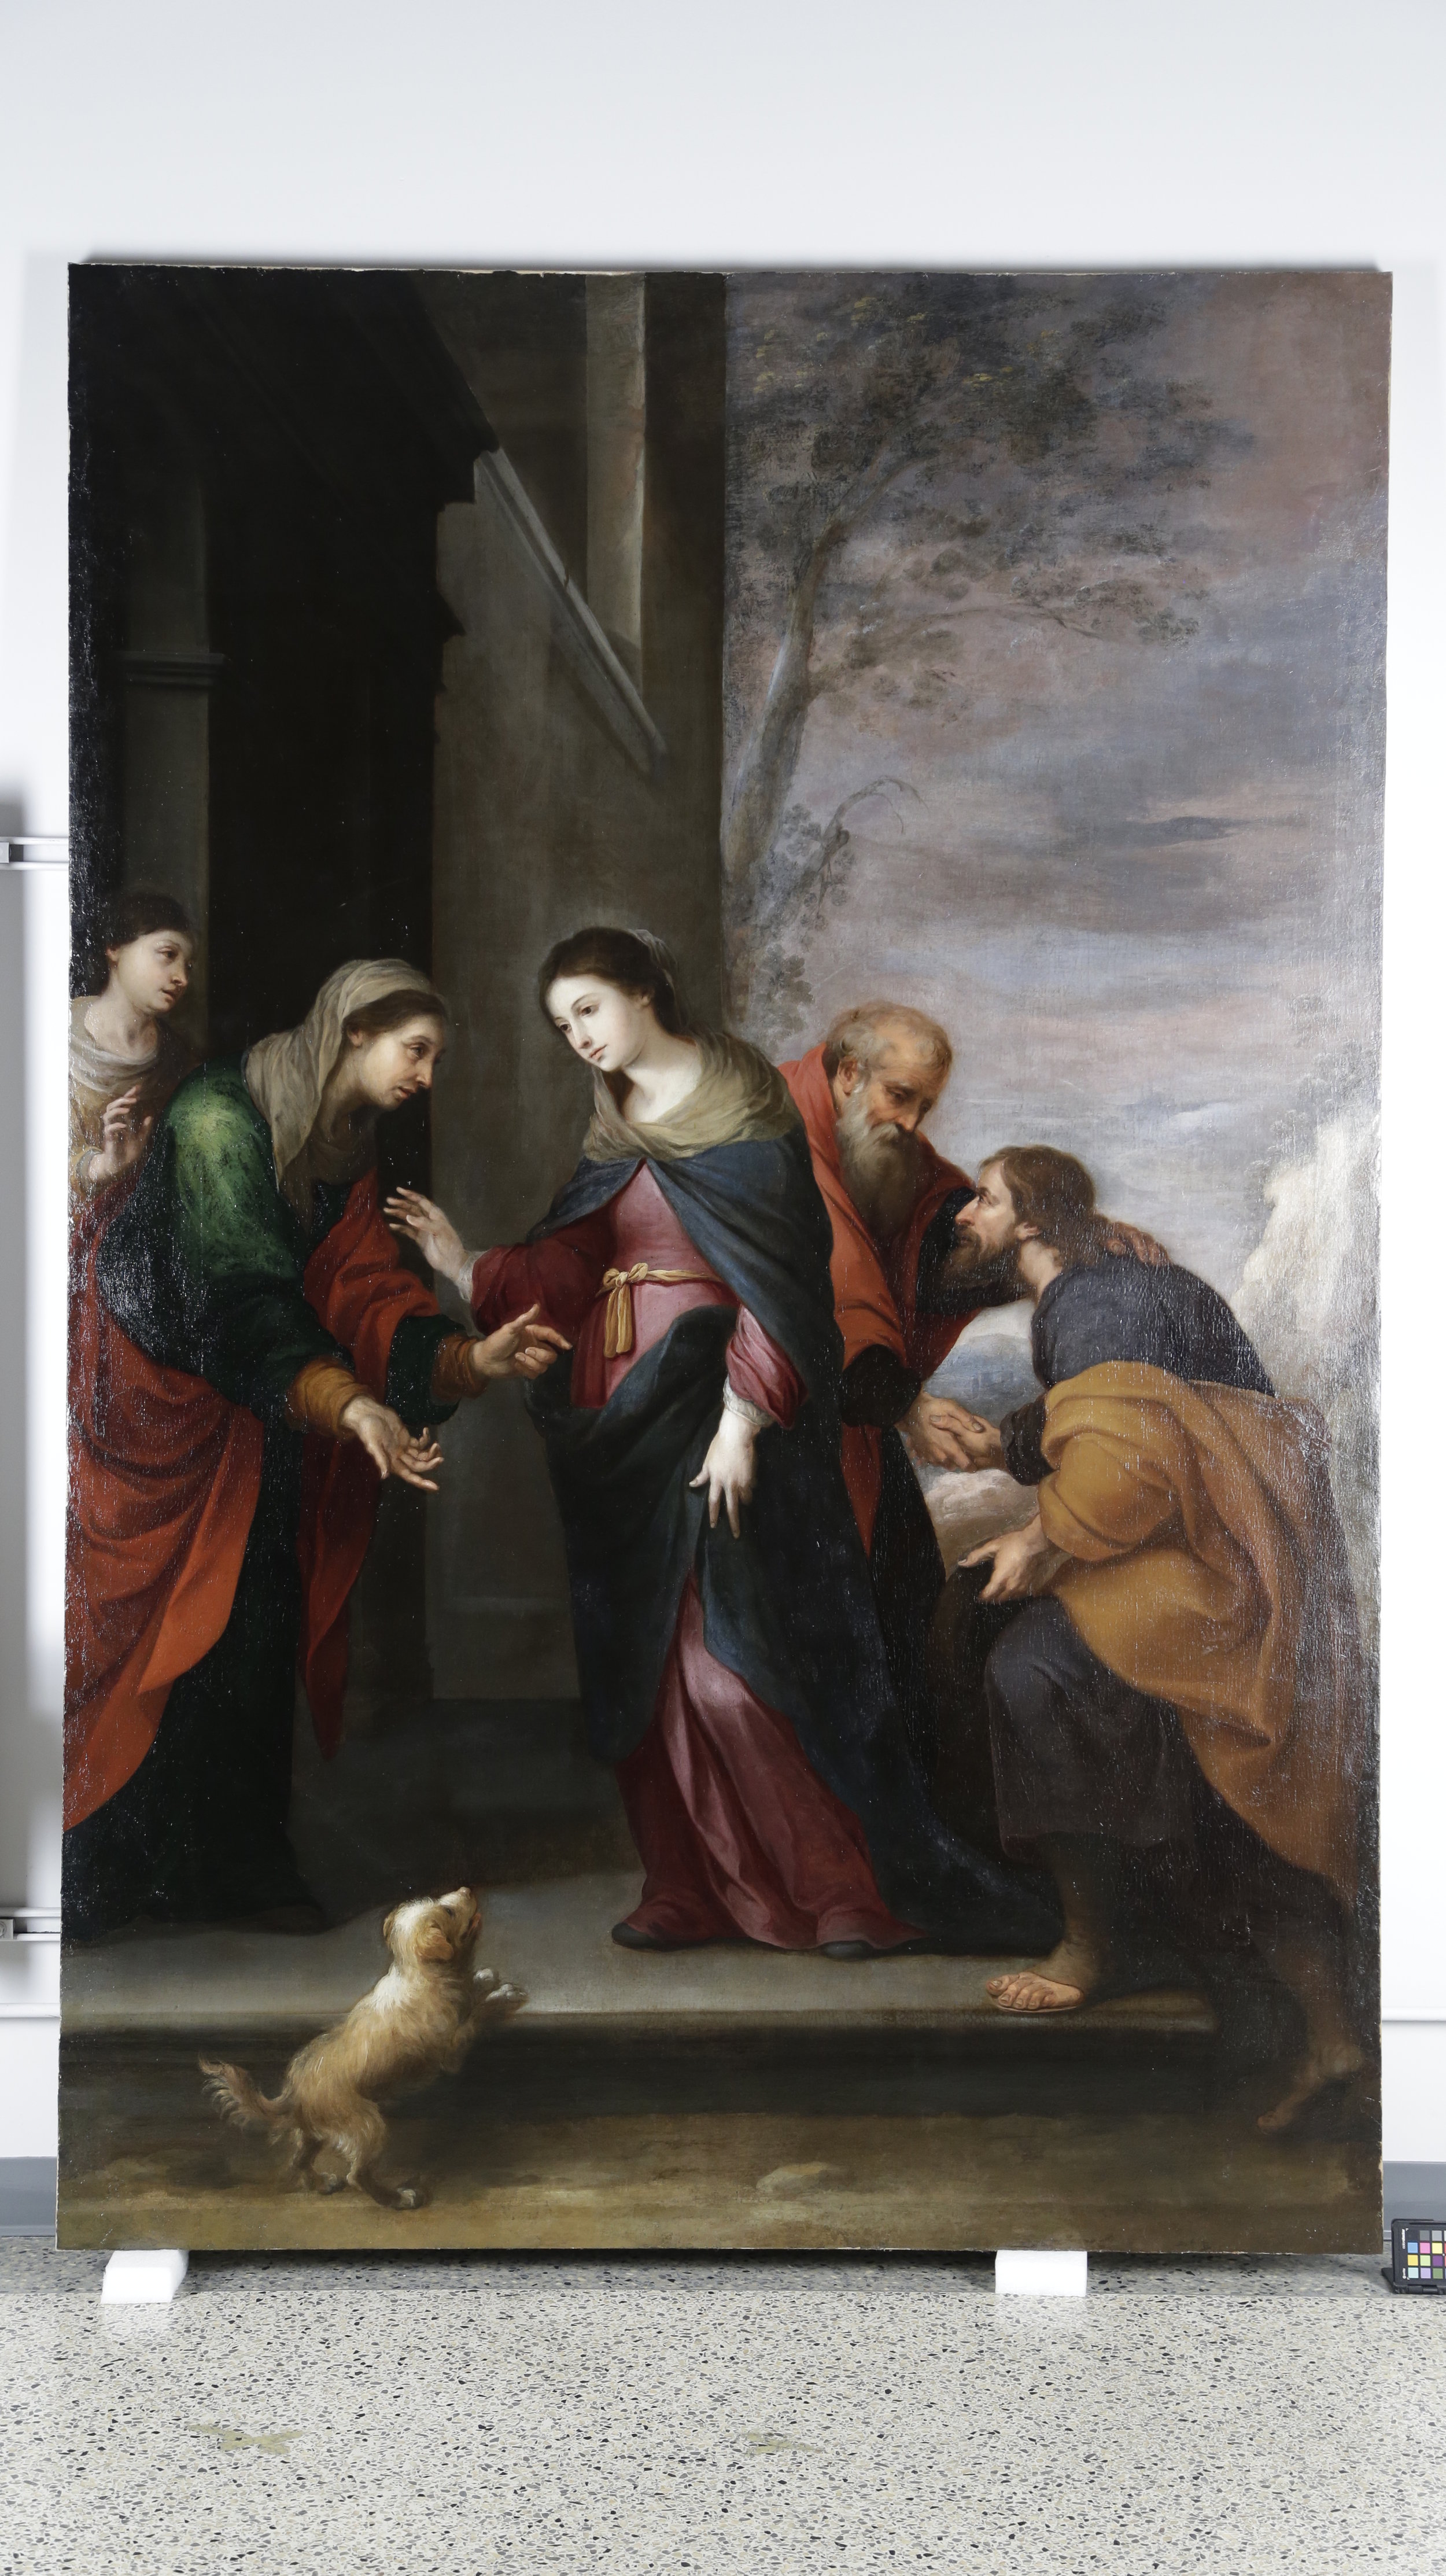
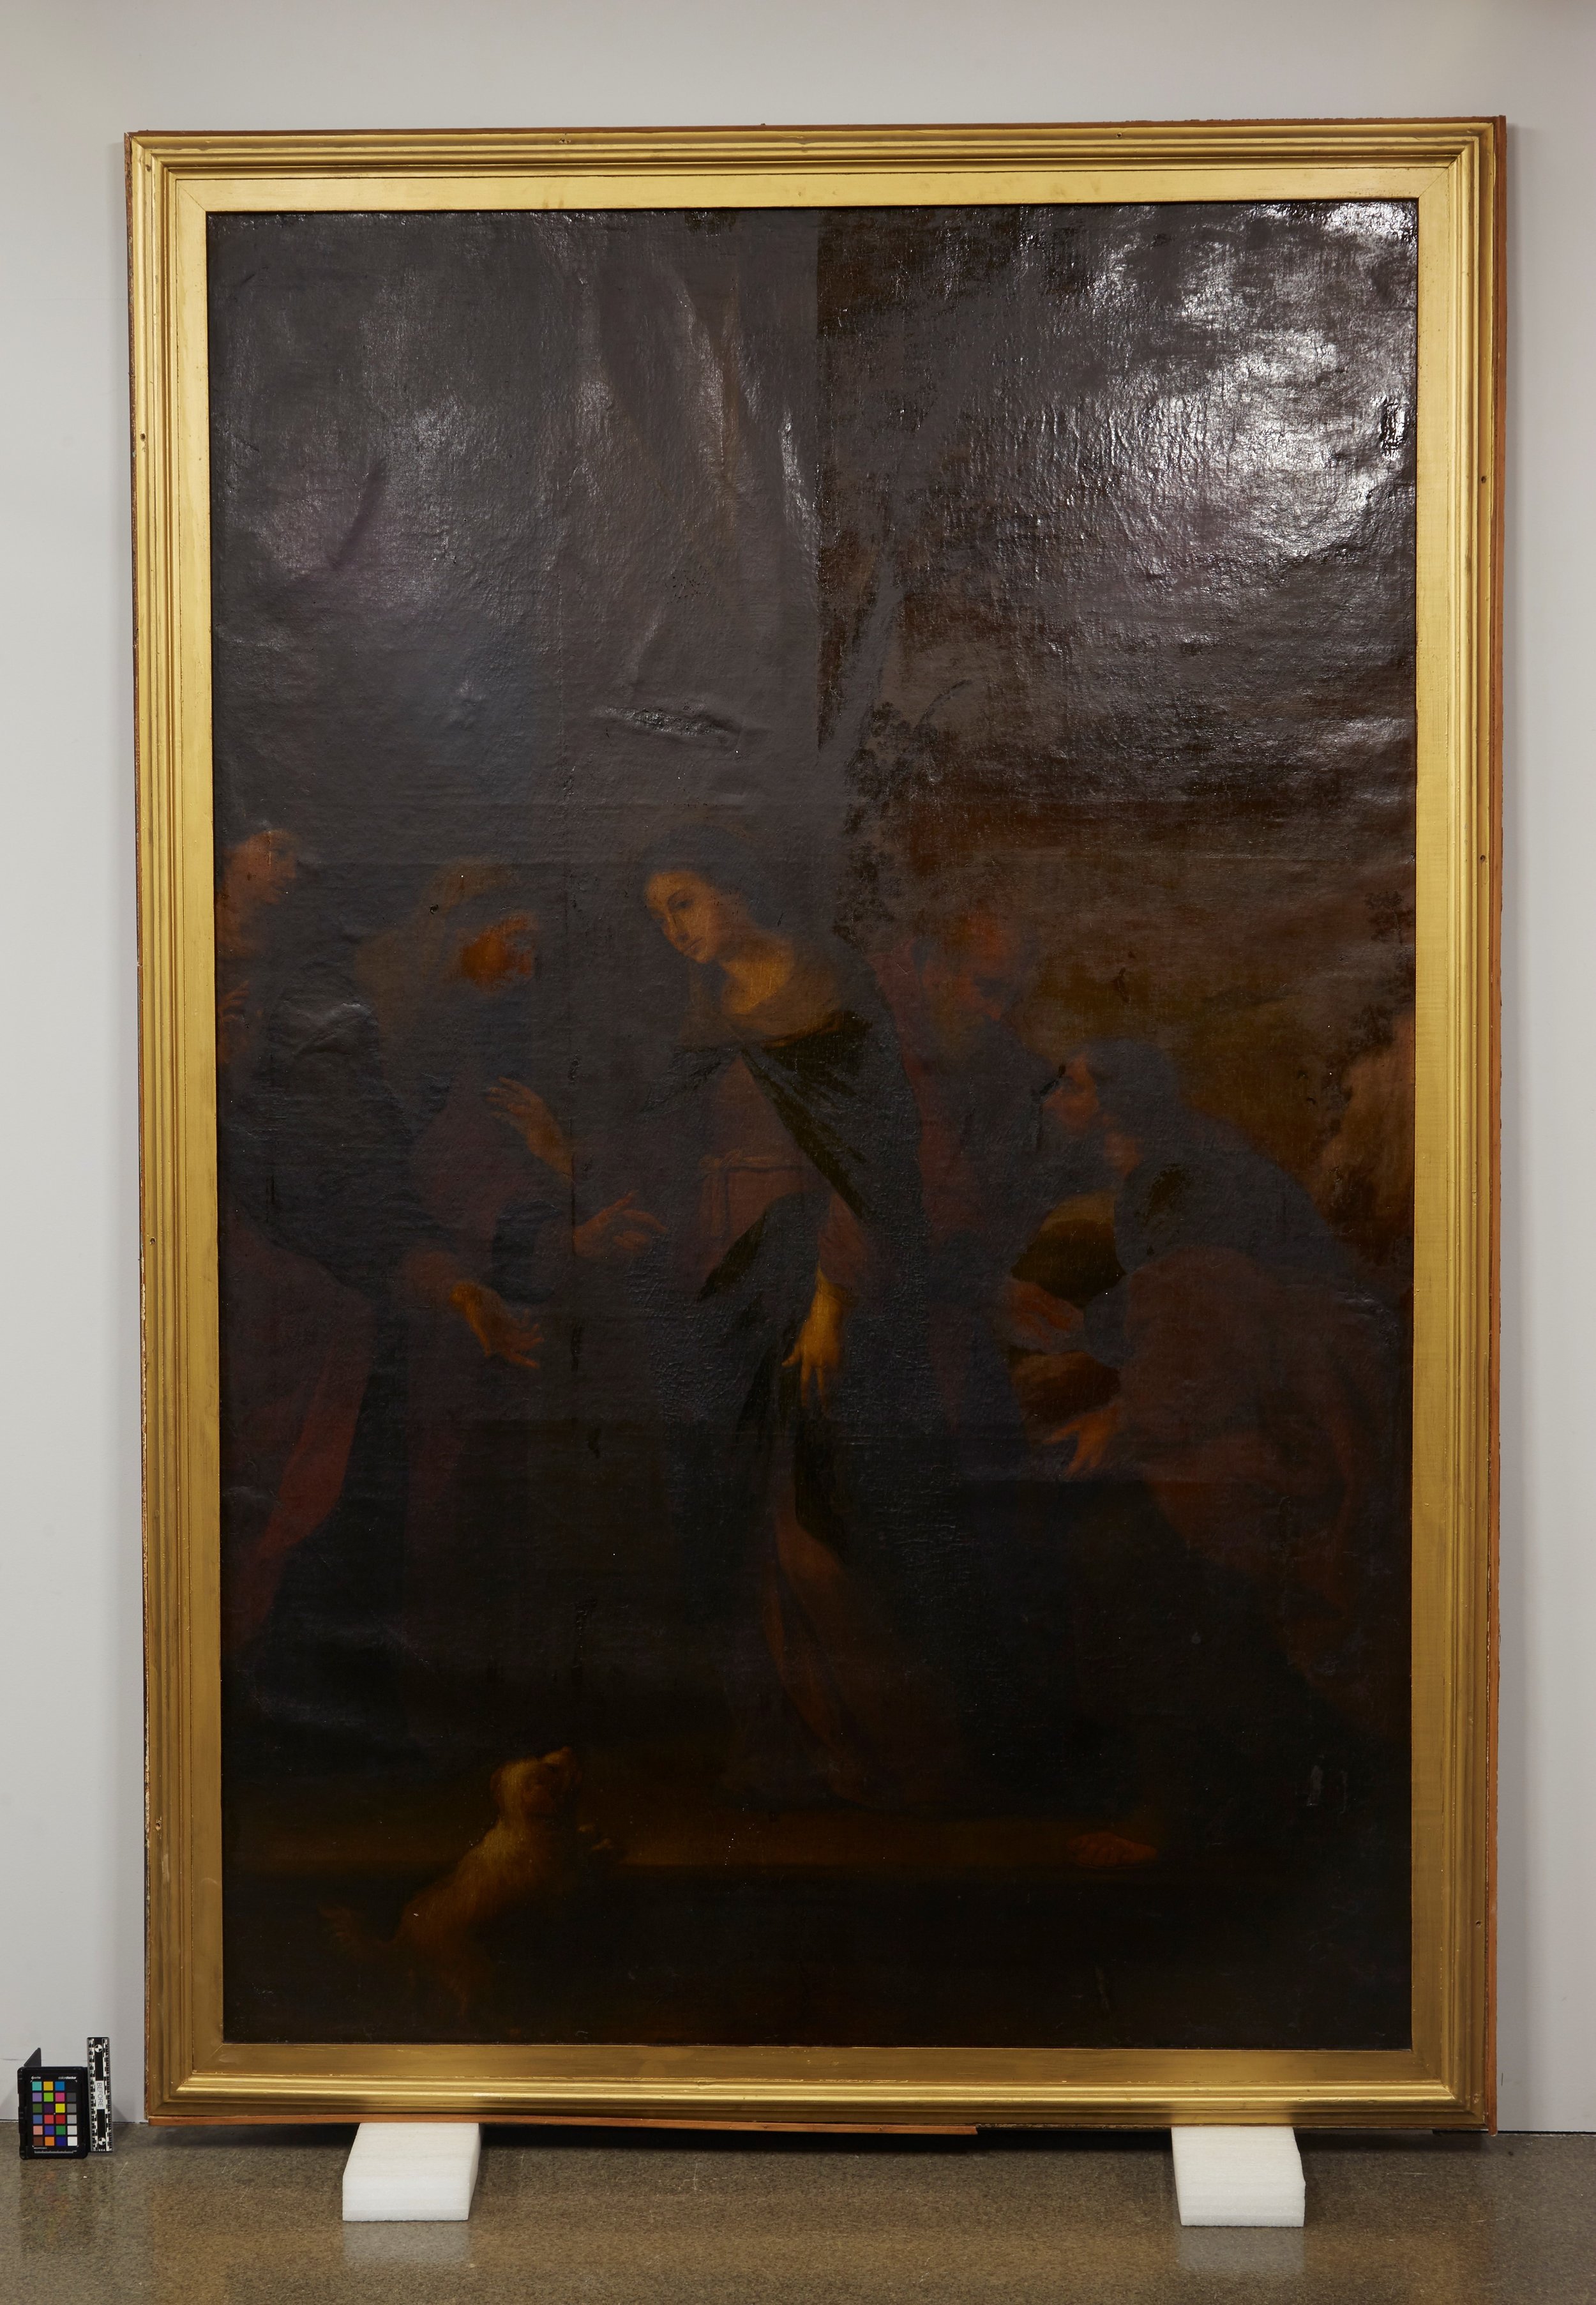
The process of conservation can often yield dramatic results, revealing images that have been hidden behind dust and grime or aging varnish for years. This is certainly the case with a painting that we recently treated here at The Center. When the piece first arrived, it was not completely clear exactly what the painted image portrayed. Though the painting depicts the well-known Biblical scene of the Visitation, showing Mary greeting her cousin Elizabeth, as Joseph shakes hands with Zachariah, the image had been obscured by age-related issues.
To learn more about the conservation of the piece and the dramatic results, we sat down to discuss the process in greater detail with our Senior Paintings Conservator, Amber Schabdach. Read our interview with Amber here, and watch the video below to see the conservation process from start to finish.
Q: To get started, what are some of the major things you look for when you conduct pre-treatment examinations, and what did you notice when first examining this piece?
A: We look for many things when examining a painting, with structural stability being the most important. After that, we run aqueous and solvent tests to determine if the painting needs to be cleaned.
When first examining this piece, I honestly did not fully know what was depicted in the image. We could make out the faces and hands of the figures, but the rest of the painting was such a dark brown, we didn’t know what to expect after cleaning.
Q: From start to finish, the painting underwent a dramatic change. Removing the thick layer of old varnish to reveal the painting beneath seems to have been an important step in achieving the end result. Is the way that the varnish discolored something you expect from older paintings? Did removing the old varnish reveal more about what some of the next steps in the treatment process needed to be?
A: There were actually many layers of different varnish present, along with a thick layer of grime and some soot. We had to “unpack” the layers of varnish, using different solvents and cleaning methods to get down to the original paint layer. This varnish layer was especially heavy and dark compared to most older paintings— it looked like someone kept adding more varnish over time to “refresh” the surface, in turn, locking more grime into it. Once varnish was removed, it was then apparent just how much old repaint was present and would need to be cleaned or adjusted during the later inpainting stages.
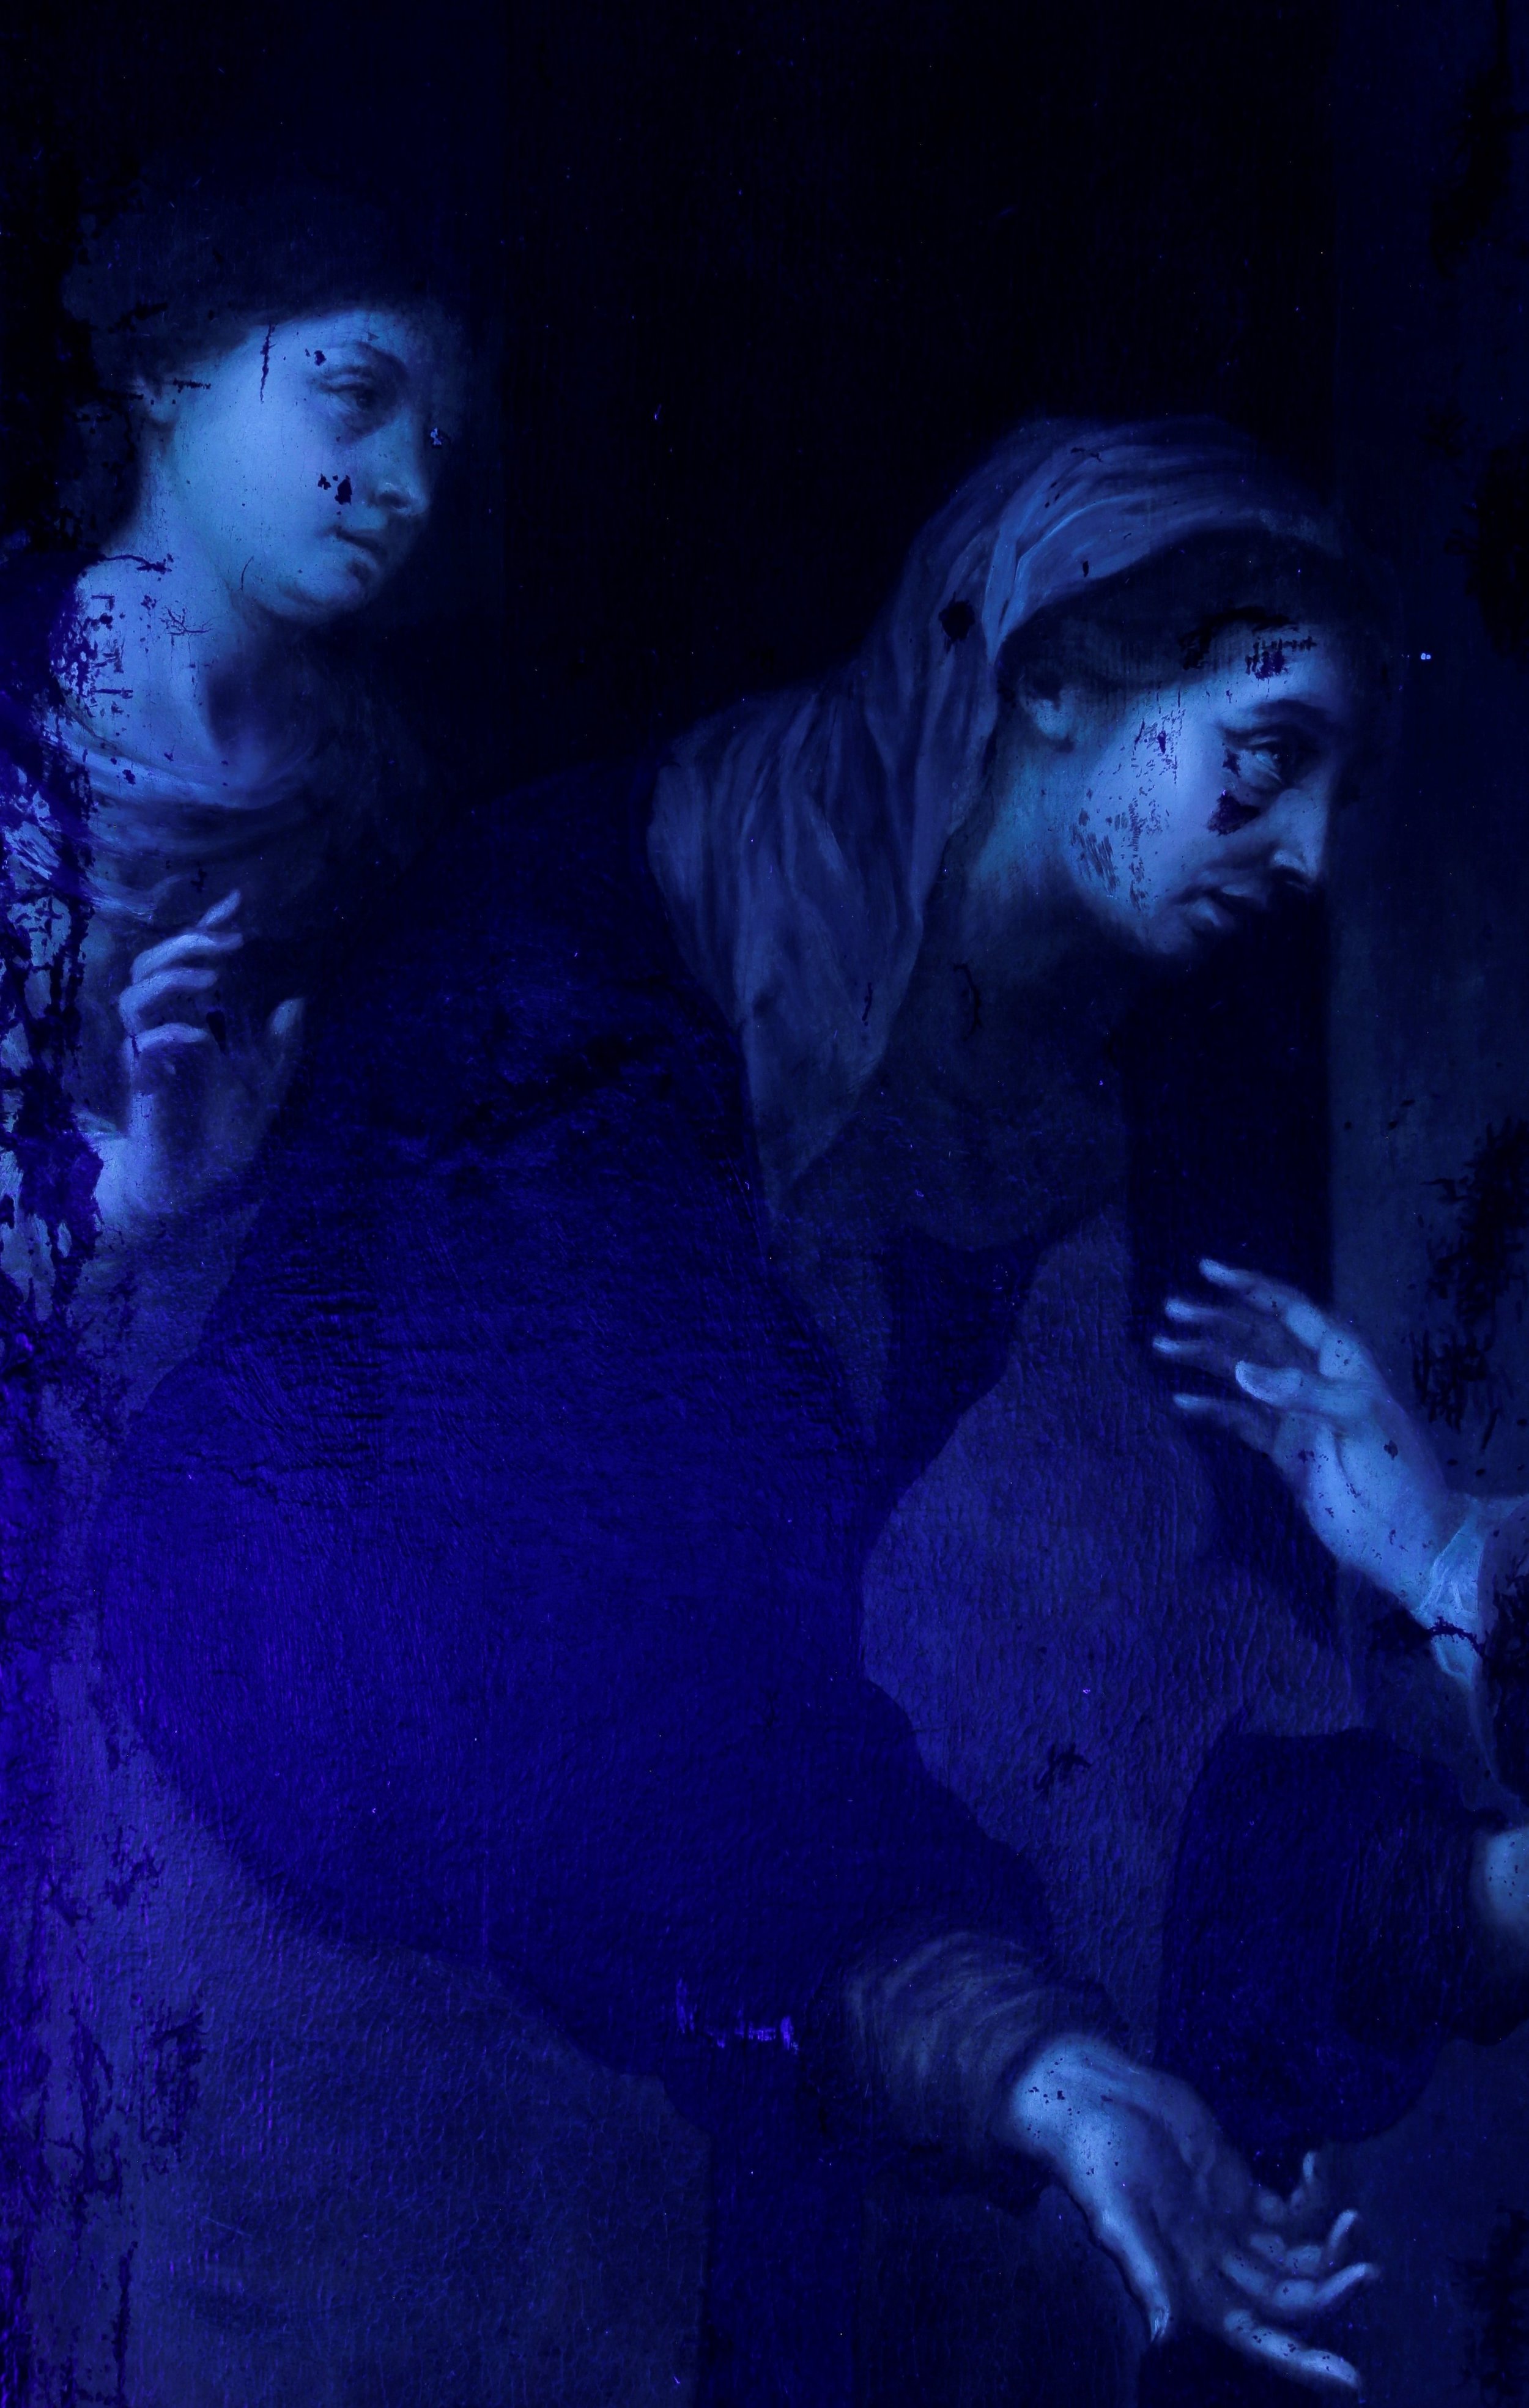
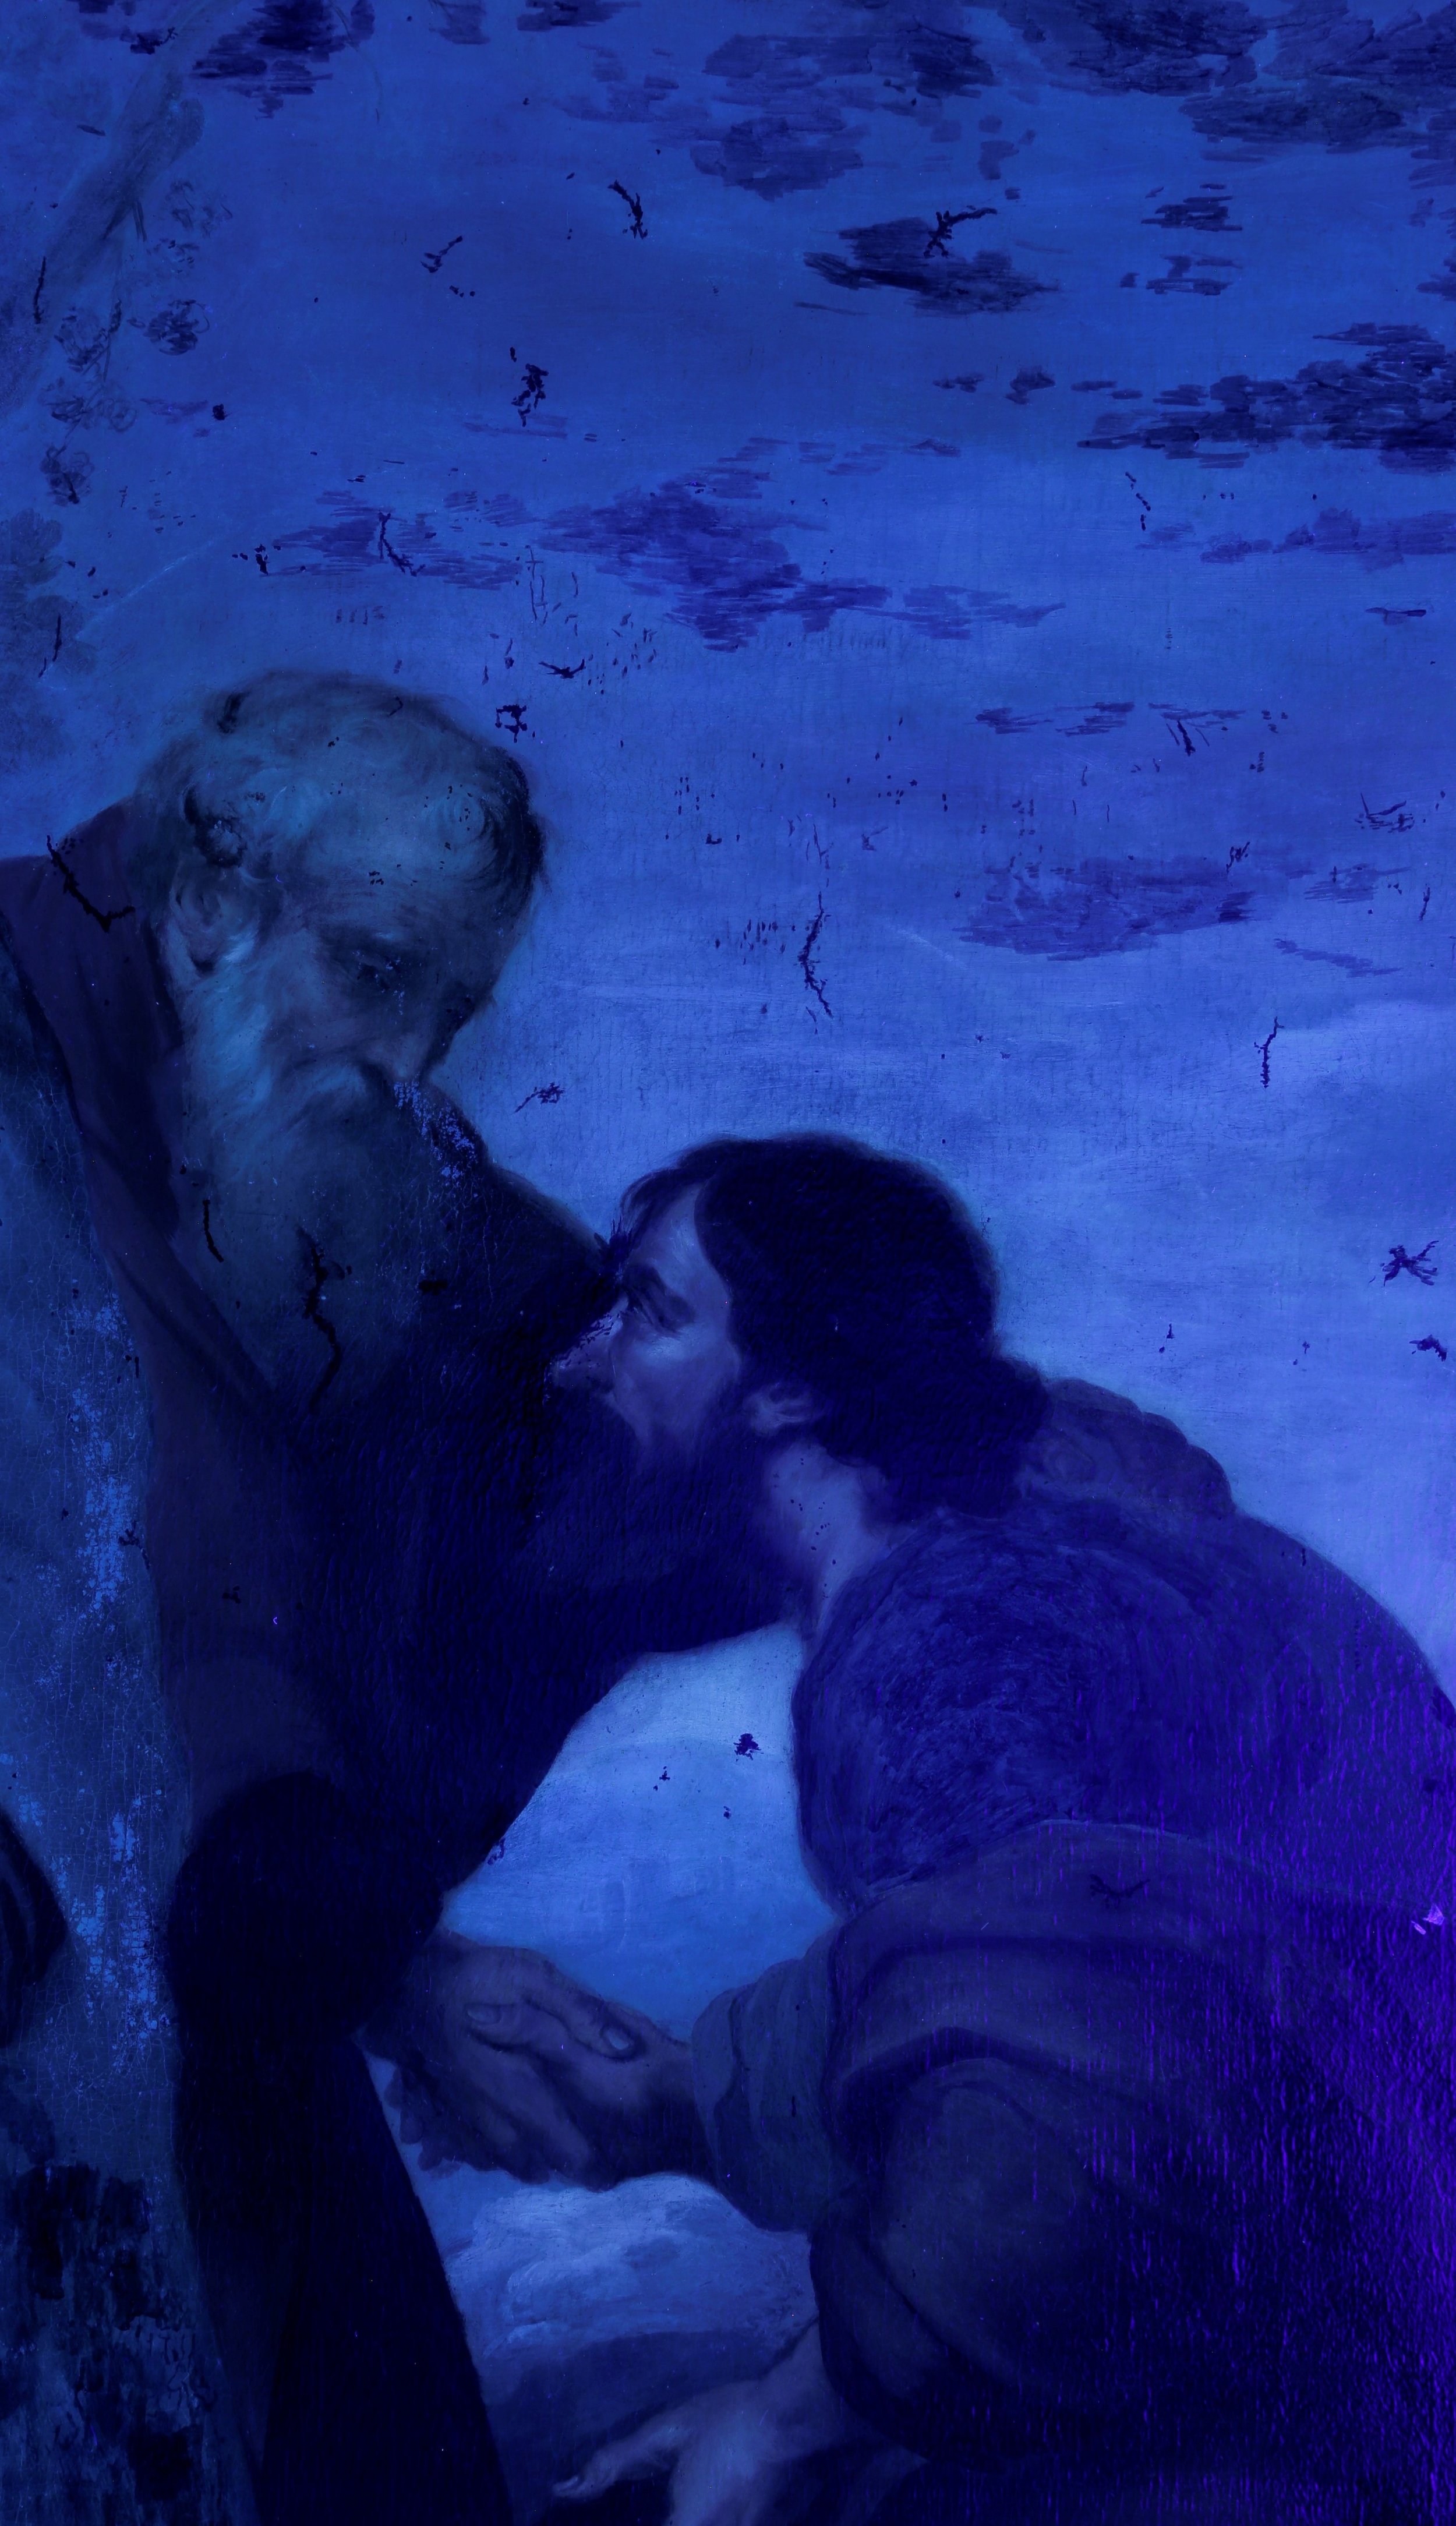
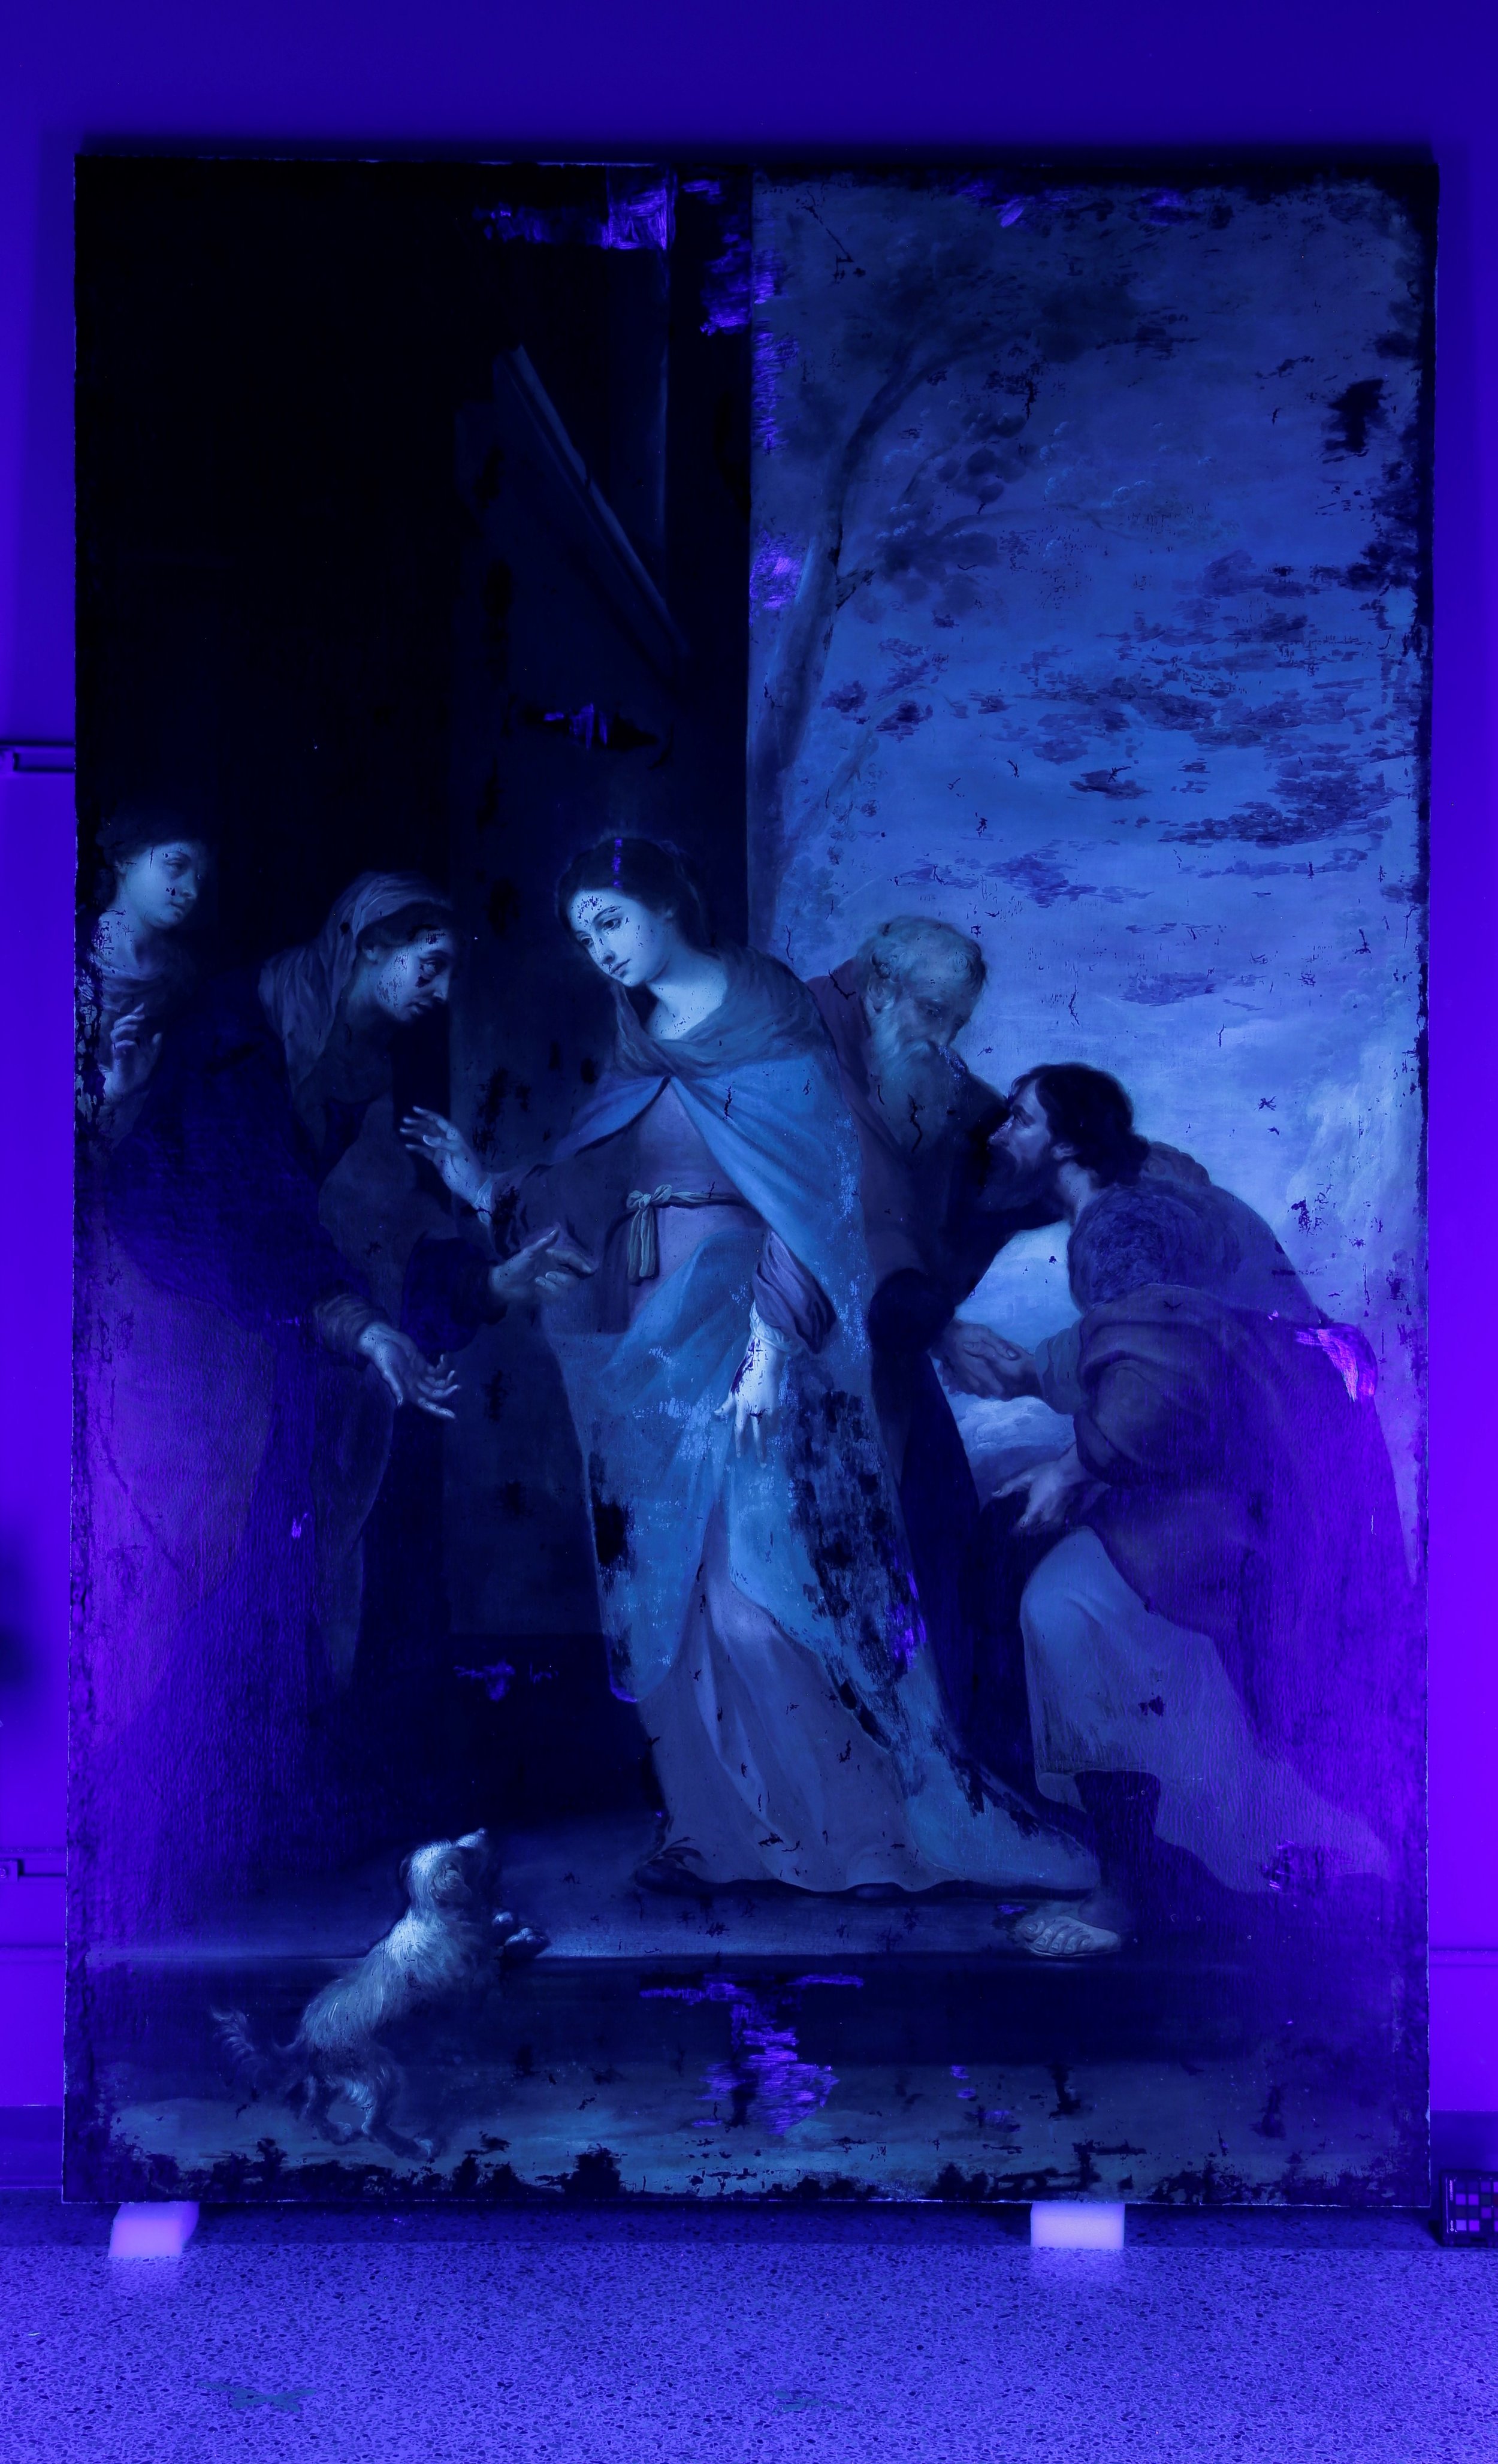
Q: The video shows the team working with UV light—can you explain a bit about how UV light is used to help navigate the treatment process for paintings, and how it helped to guide the treatment for this particular piece?
A: A long-wave ultraviolet lamp is a common tool for examining paintings. Used to examine the surface characteristics of a painting, this wavelength, just beyond violet in the visible spectrum, can help in the determination of varnish types, amount of retouching present and also certain pigments in the paint. Ultraviolet (UV) light causes aged varnishes to fluoresce or glow, with different varnishes producing a different color fluorescence. Depending on the age of the coatings, and their thickness, the underlying paint film and older retouching may be easily detectable or not visible at all through the fluorescing varnish.
When this painting was put under a UV light, the fluorescence was so strong, that all of the old retouching was not visible. Once the varnish was removed, however, the retouching could be readily seen under UV.
UV also helped in the cleaning process. The varnish was so thick and took so many campaigns of different solvents, that UV was a good tool to use to look at the painting and see that all the varnish was removed, as it wasn’t readily apparent in normal or strong light.
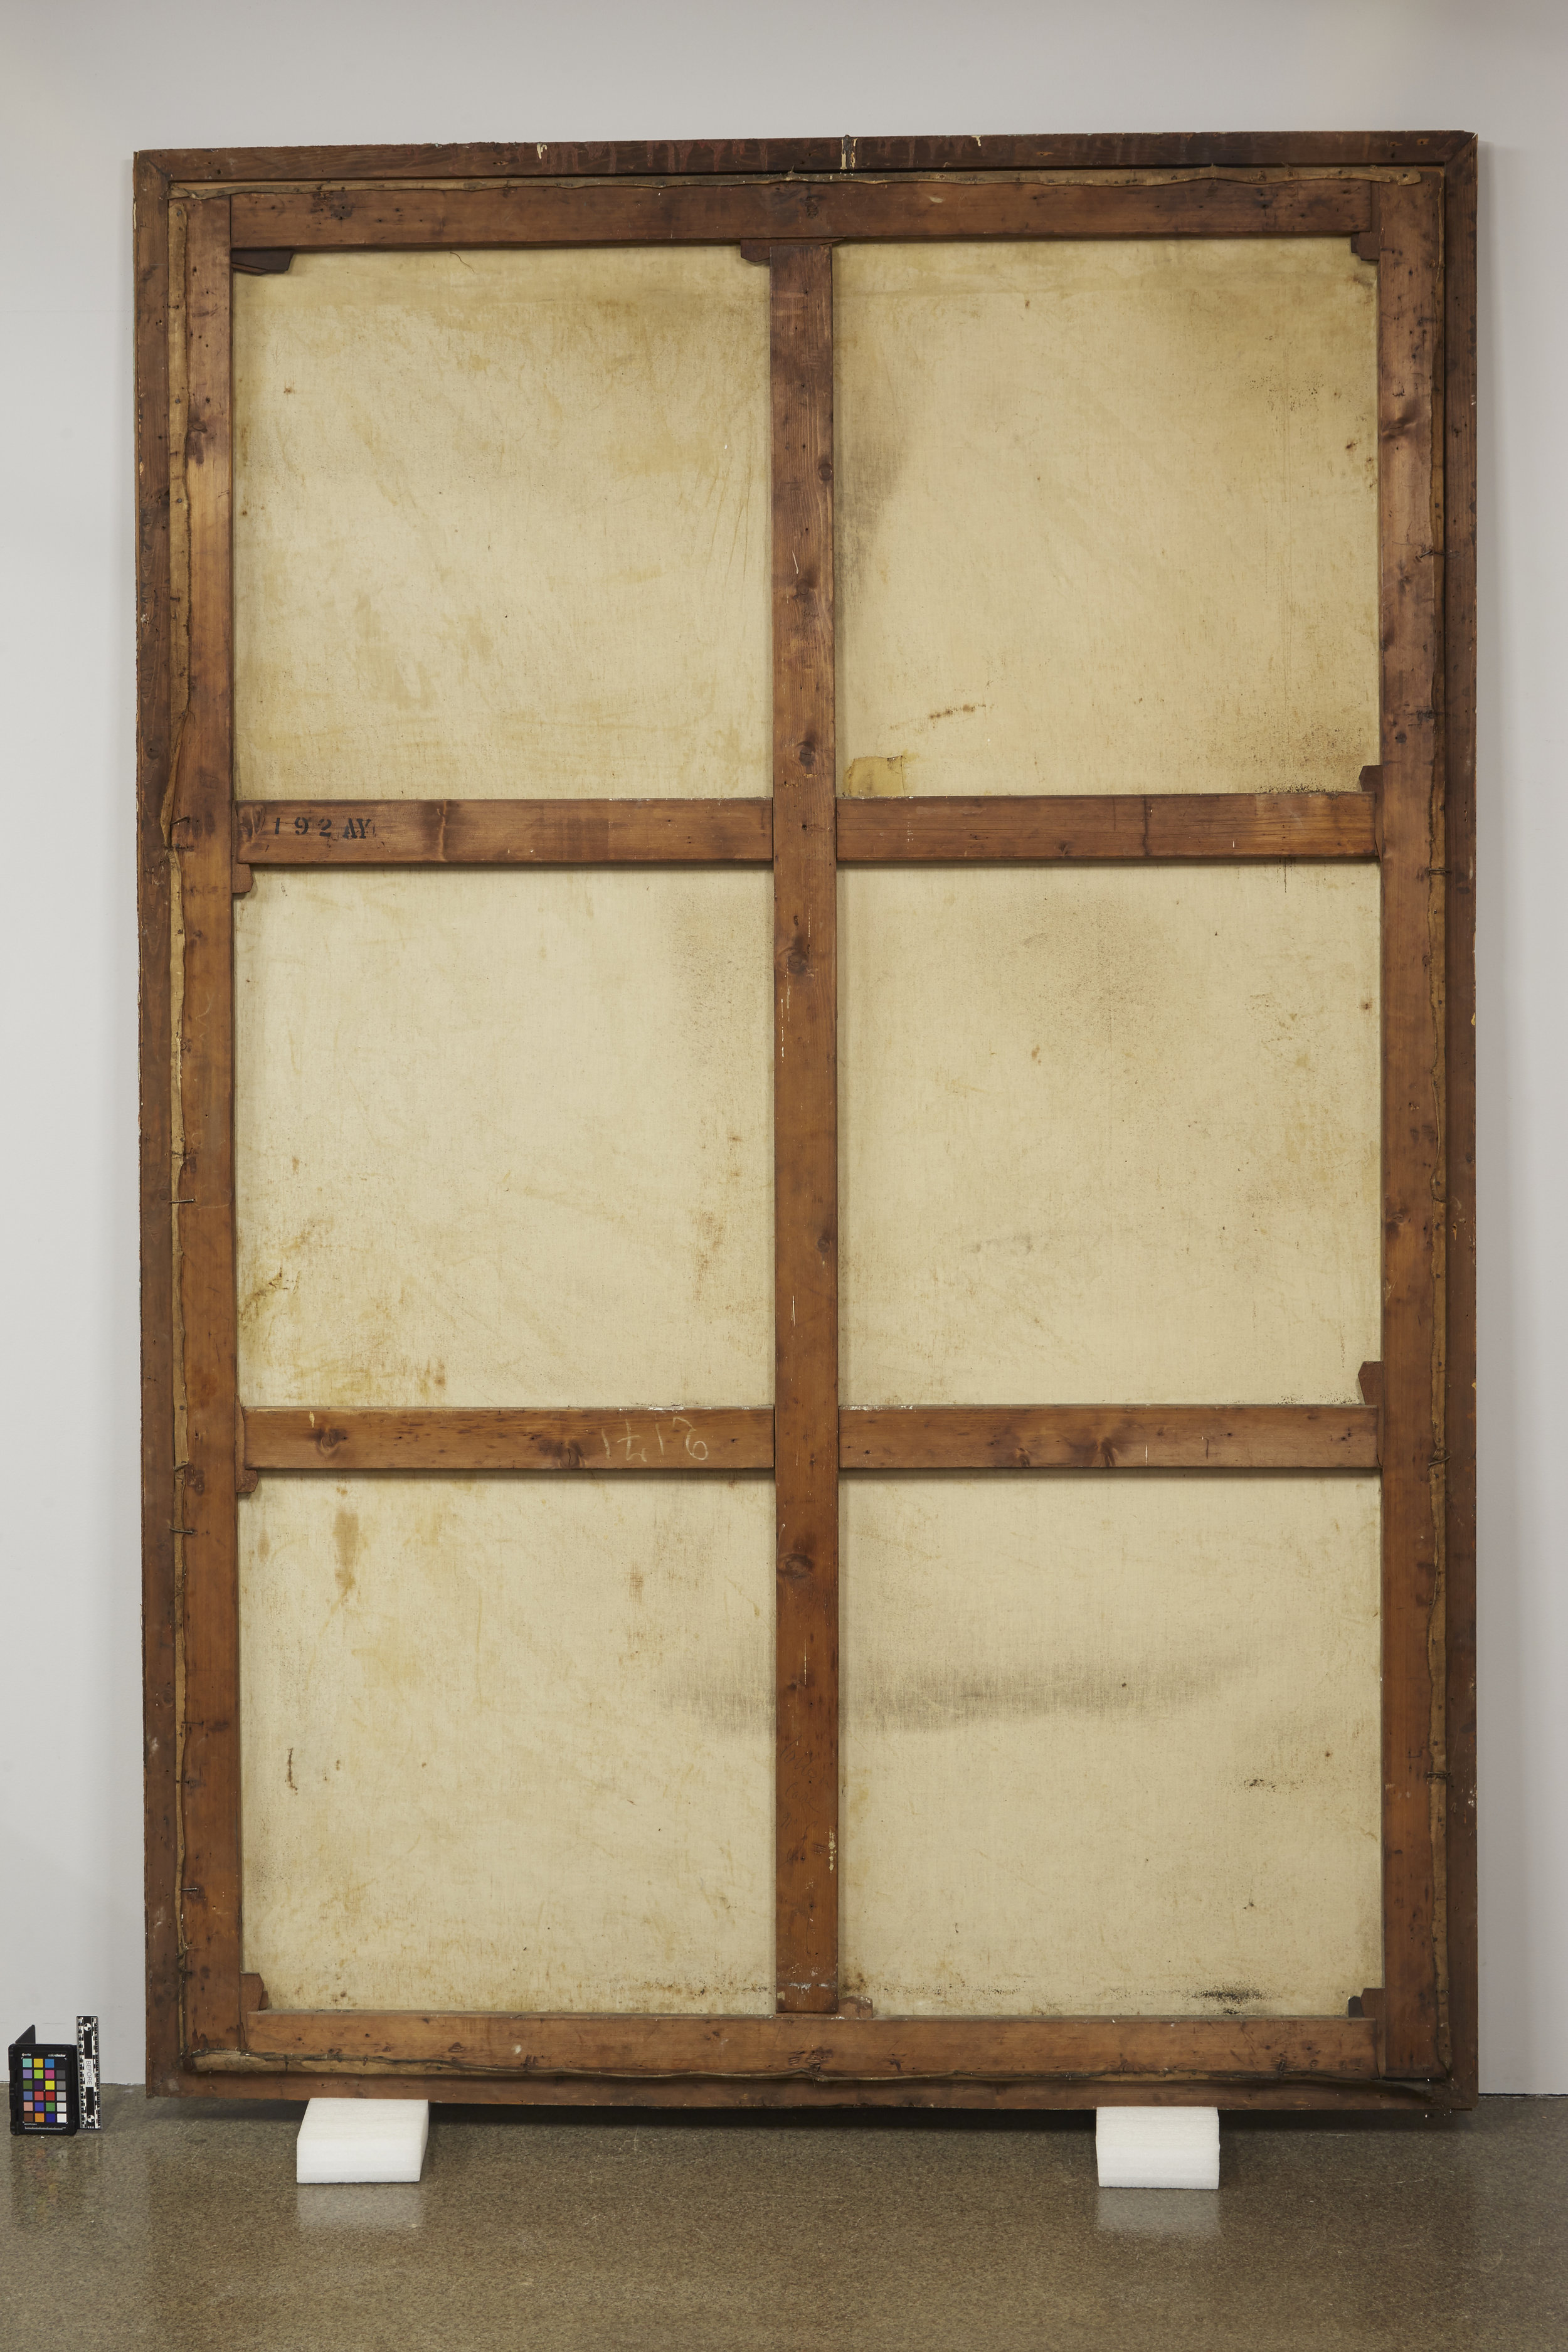
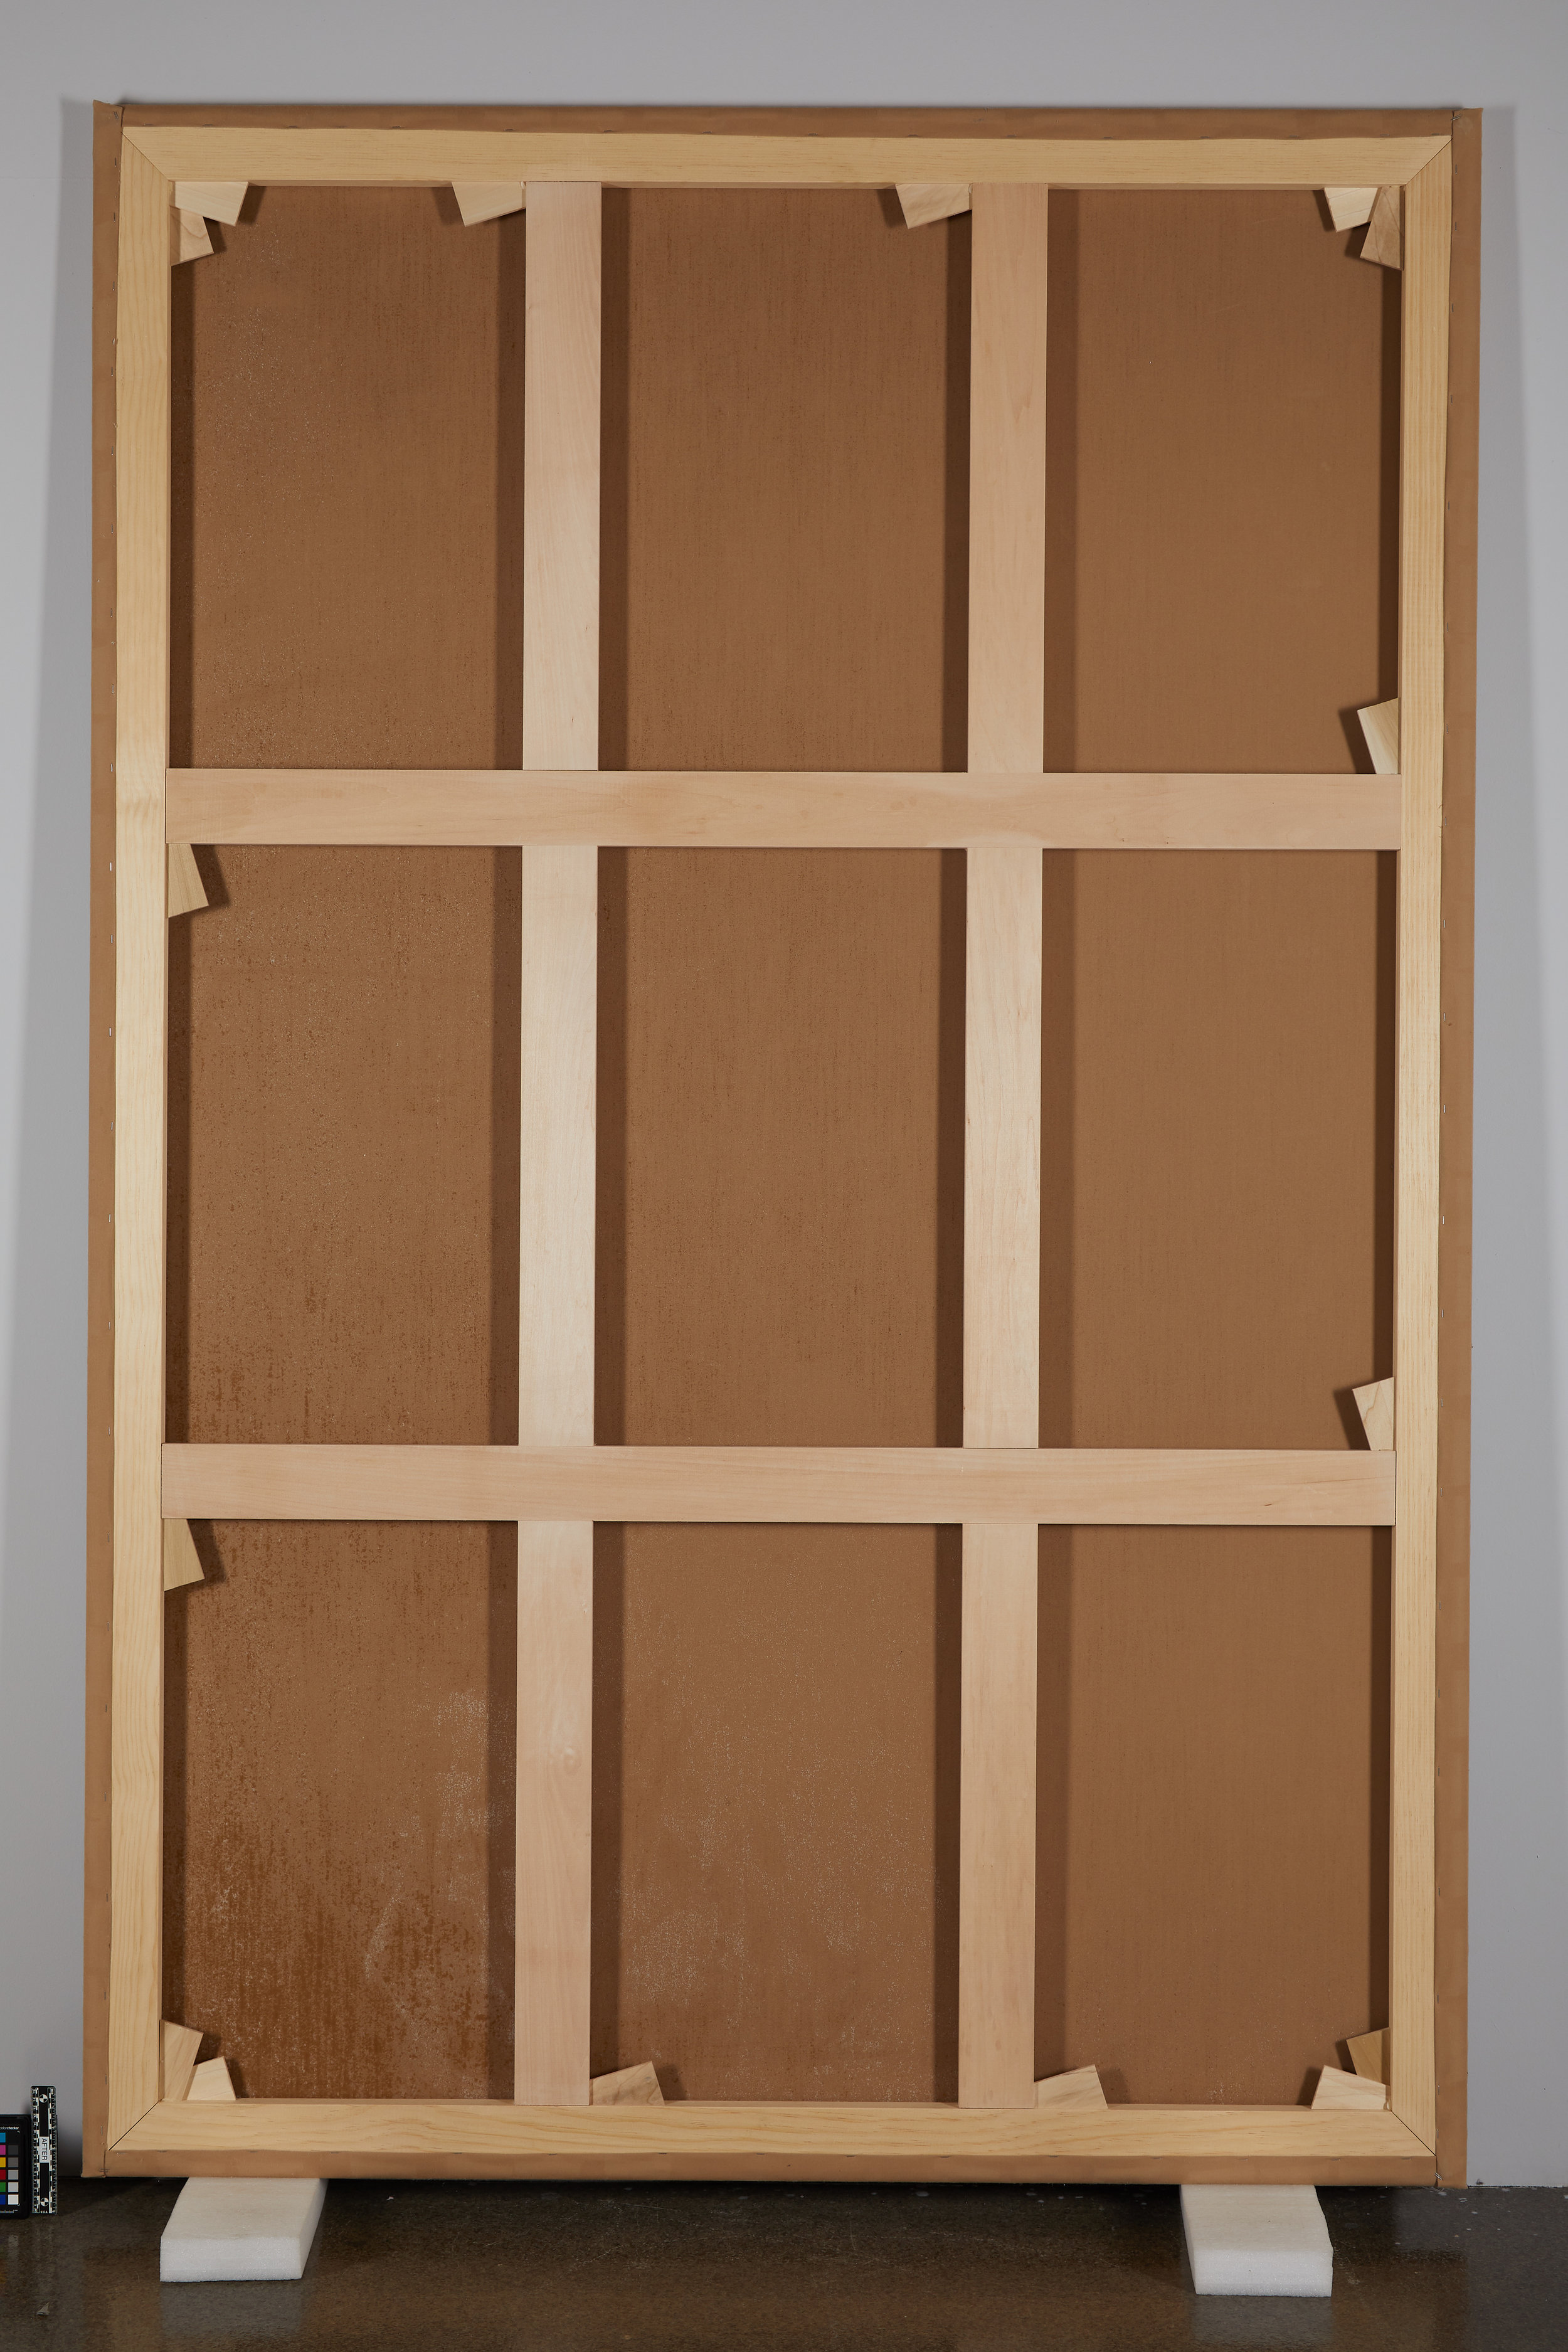
Q: In conserving this painting, both aesthetic and structural issues were addressed. What were some of the essential steps in making sure the structural elements of the painting were sound going forward?
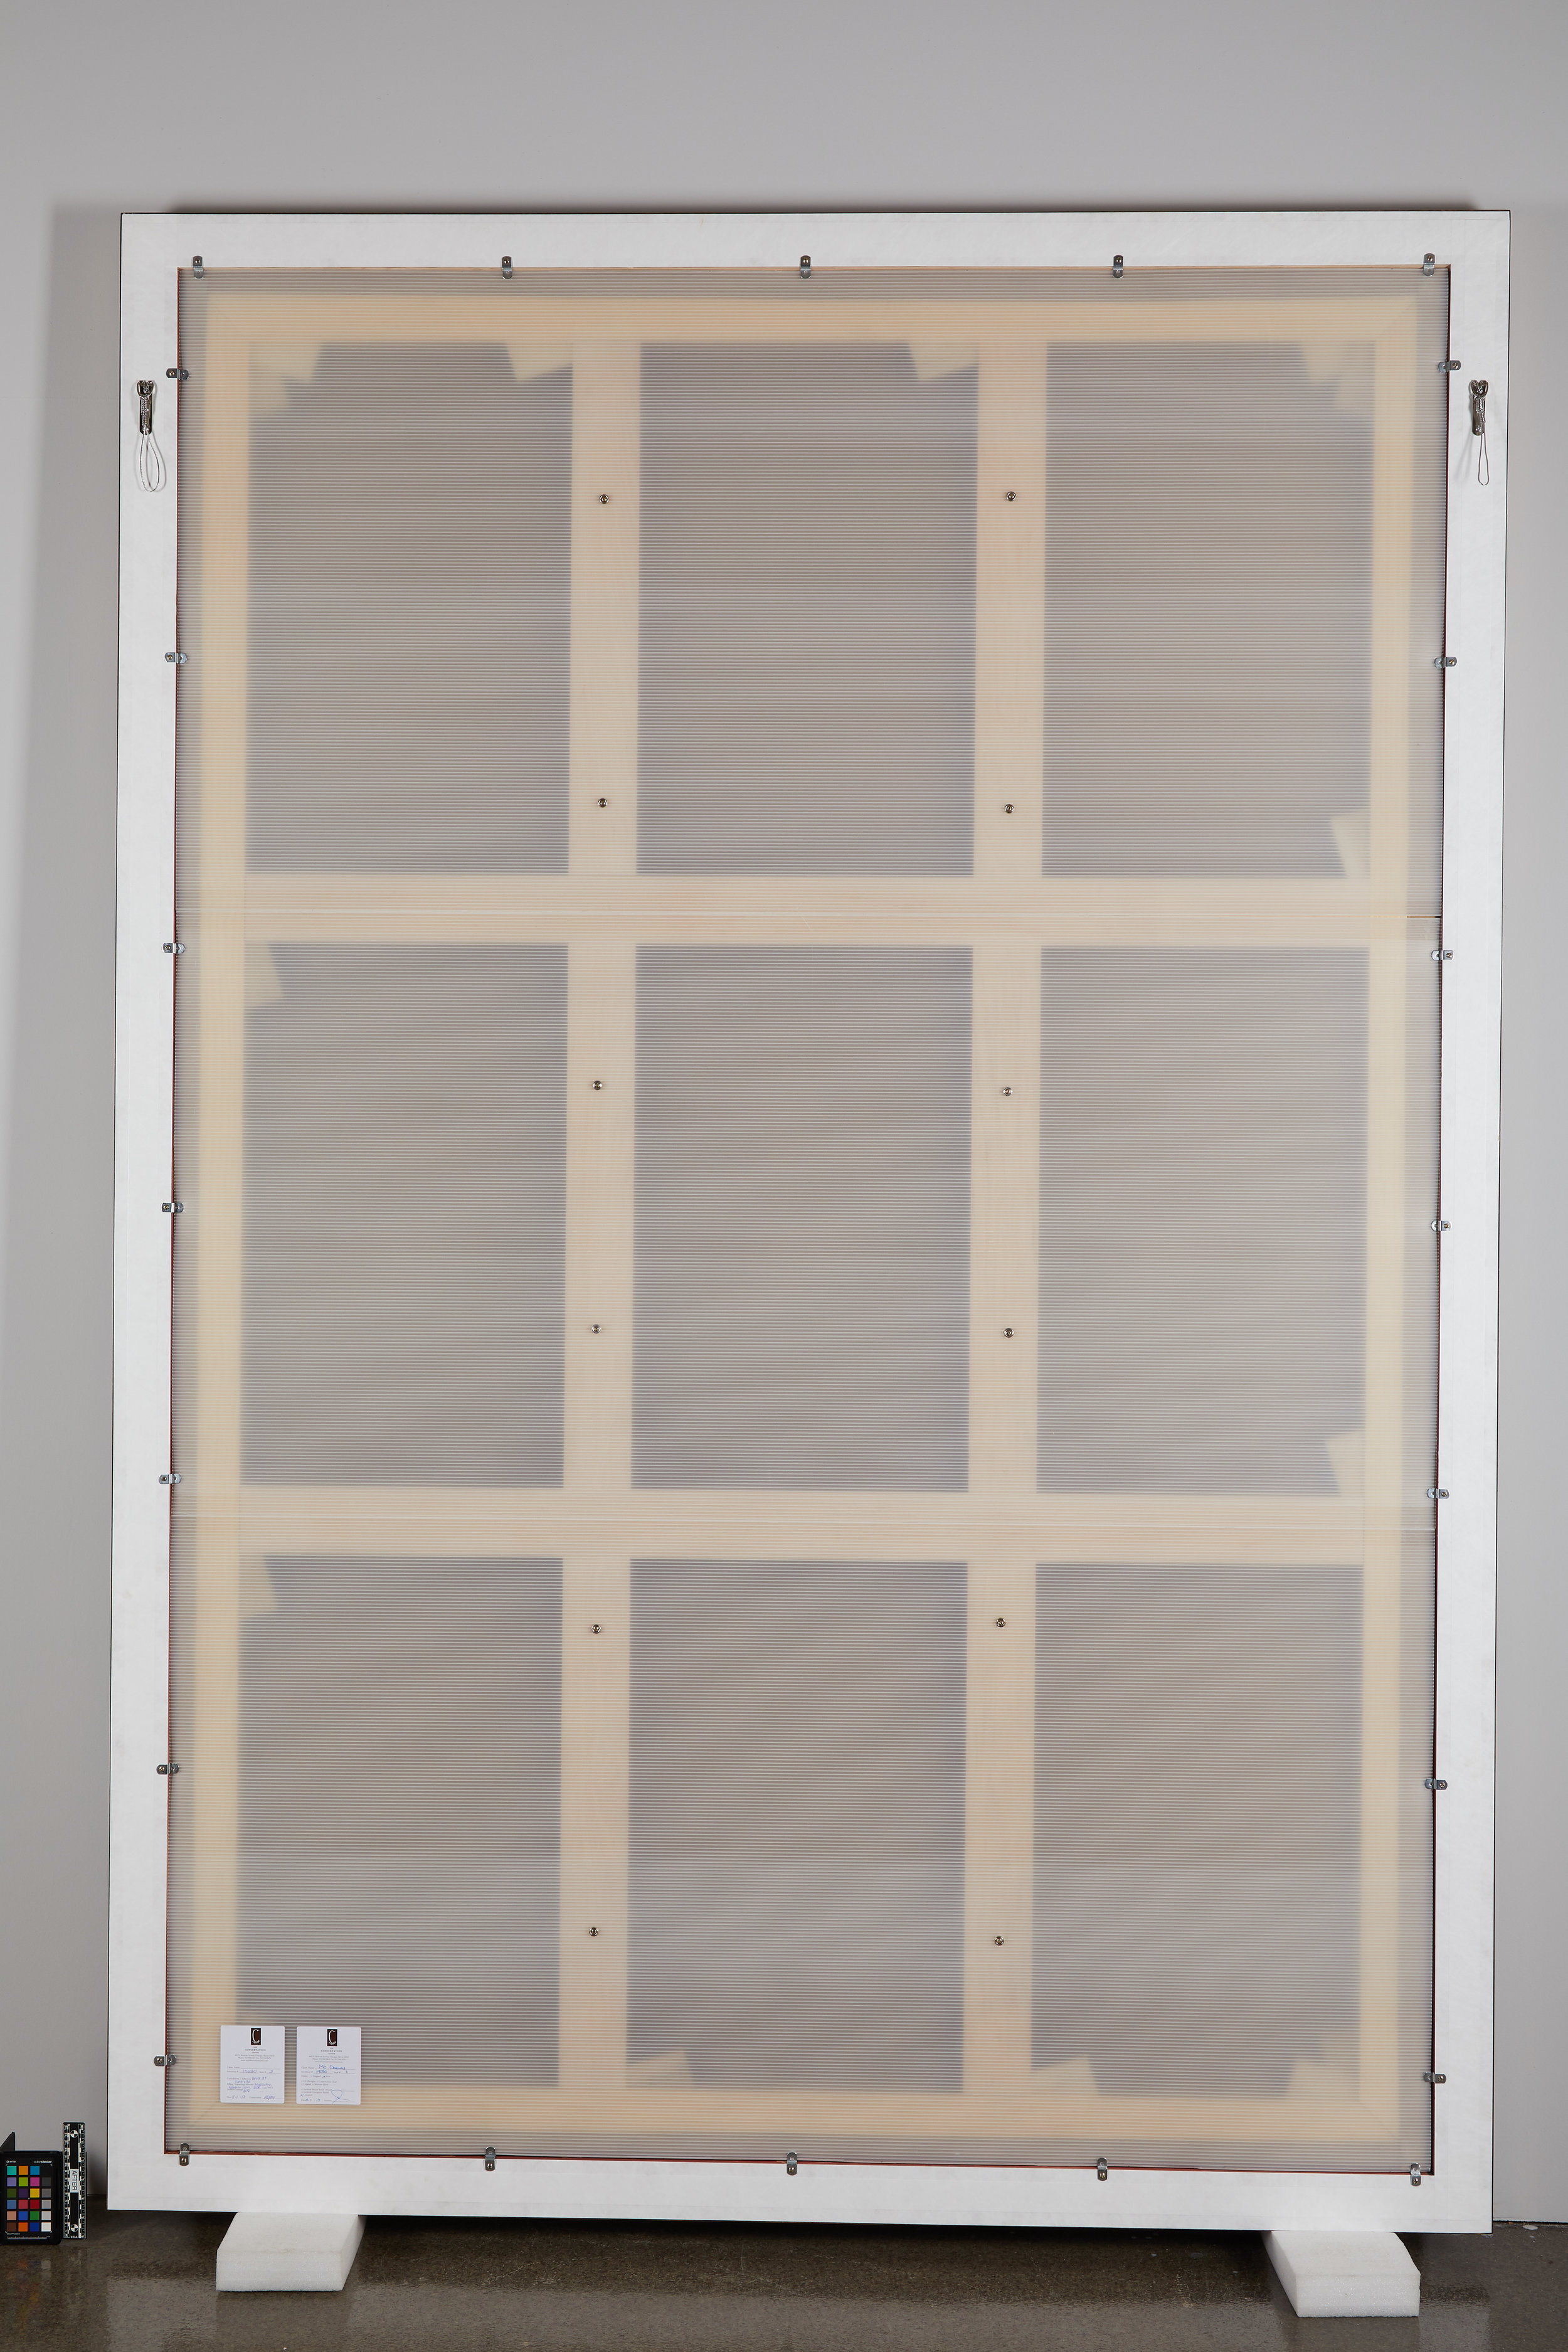
A: When the painting came to us, it was delaminating from its lining canvas, and the lining canvas was old and brittle. Additionally, the stretcher supporting the painting was inadequate in size to hold a piece this large. We had to remove the original canvas from the lining canvas, and prepare it to be lined to a new canvas. Once it was re-lined using a reversible, conservation-grade adhesive, it was then restretched onto a much sturdier stretcher.
Q: In the video we get to see areas of loss in the painting being filled and inpainted, which are evidently very painstaking processes. Why is it important that reversible, conservation-grade materials be used in these processes?
A: Conservators choose materials that can be reversed, so in the future, if needed, another conservator could remove all the work that was done during the painting’s previous conservation campaigns, and get back down to the original paint layer. We also do not want to add anything that may harm the materials that the painting was constructed with. We choose each of the materials based on the artwork we are working on, and what makes sense for reversibility if needed. We often get asked why someone would want to reverse the conservation work—but things like fires or water damage can happen, or the retouching can change color over time and no longer match. The conservator wants their hand to not only be invisible, but reversible.
Q: Now that the treatment for this painting is complete, do you have any advice for the future care of the piece? What are a few things that collectors can do to help ensure the longevity of their artworks?
A: Obviously, there are many things one can do to maintain their art collection—but temperature and relative humidity control are the most important. There are ideals, such as 70-72 degrees Fahrenheit, and 40-50% relative humidity, which aren’t always possible in a private home. We urge consistency of temperature and humidity without sharp fluctuations. We also recommend that artwork be displayed on an interior wall, with no direct sunlight hitting the surface.
To watch the dramatic conservation process from start to finish, click the link below:


